NVivo Guide
Importing documents in NVivo10 in 3 minutes
1. Open NVivo and go to the 'Internals' tab
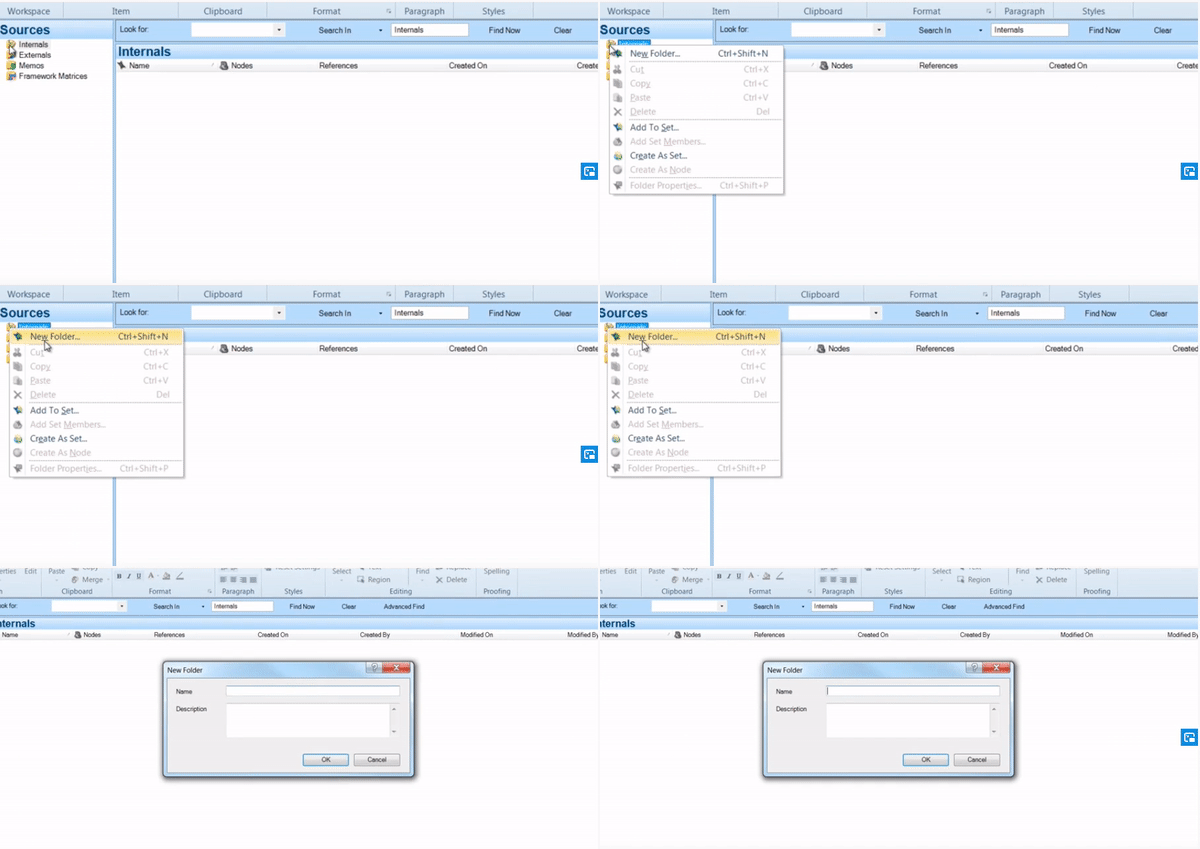
- To help yourself stay organized right from the very beginning you may wish to create a folder.
- On the left search bar of your NVivo workspace you will find the sources for your documents. Right click 'Internals'.

2. Import your documents
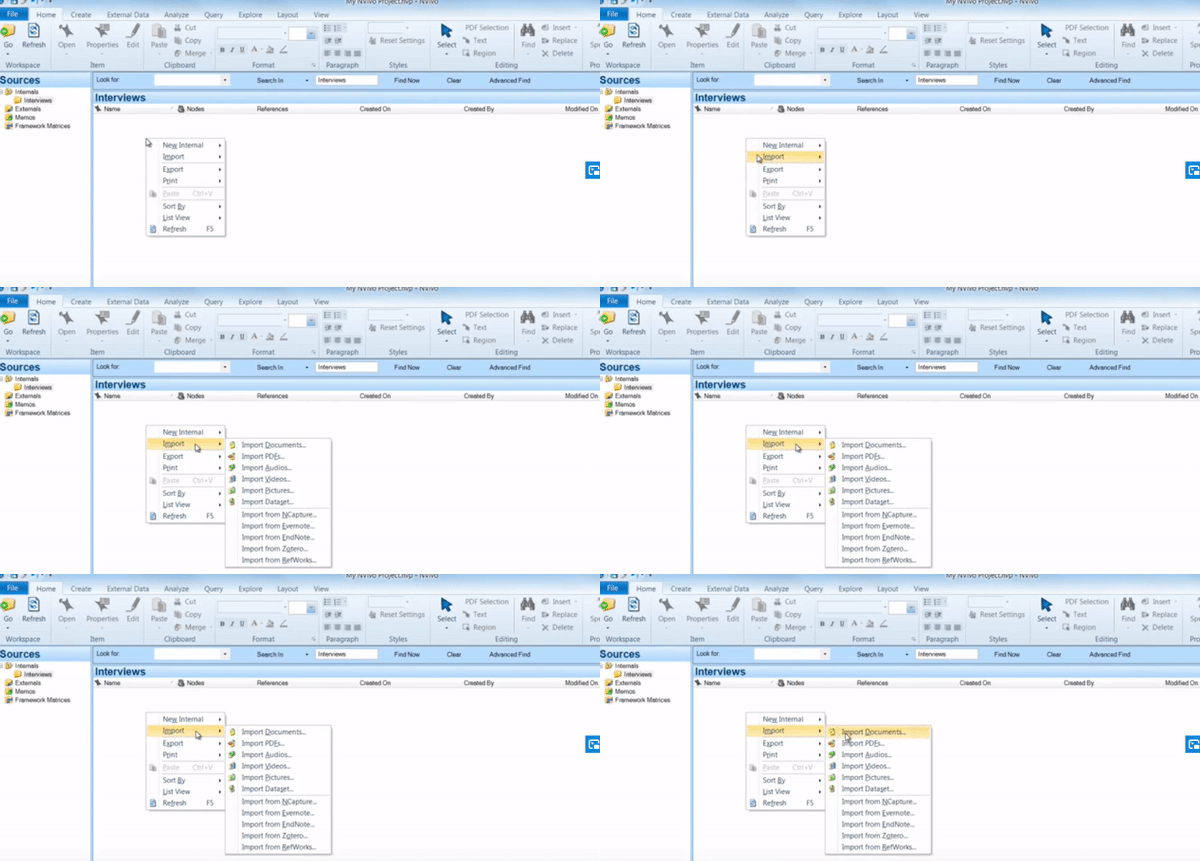
- Bring multiple documents into your folder by clicking the folder you just created.
- Navigate to the open blank space and do a right click. Select import >> import documents from the pop-up window.
- NVivo can import both .doc and .docx. It can also import text and text rich files.

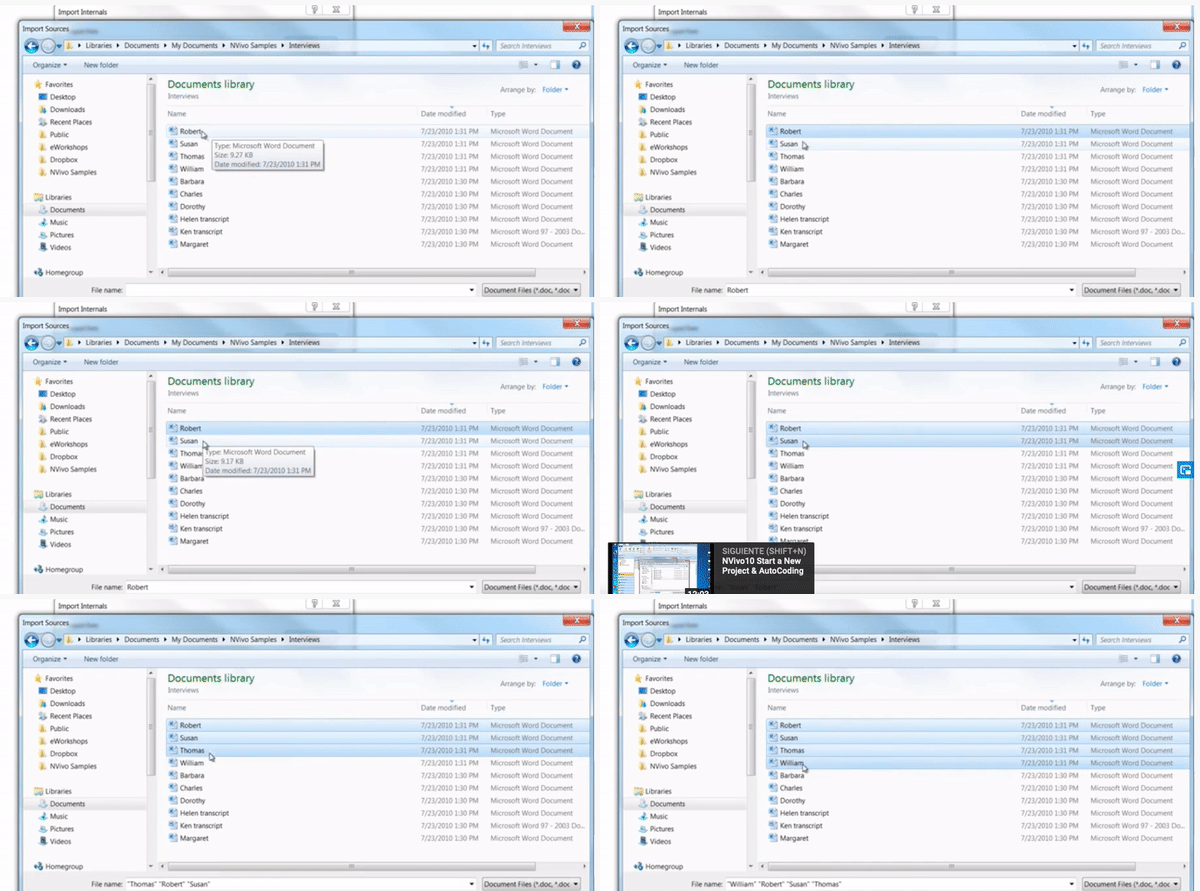
- Click 'Browse' and select the documents you wish to import to NVivo.
- You can select multiple documents by clicking the control key while selecting your documents. Once your done selecting your documents click 'Open'
- What NVivo will do now is creating a copy of each of those documents so you can have a copy of this particulars projects in NVivo while your originals are safely stored in your computer.

3. View your documents
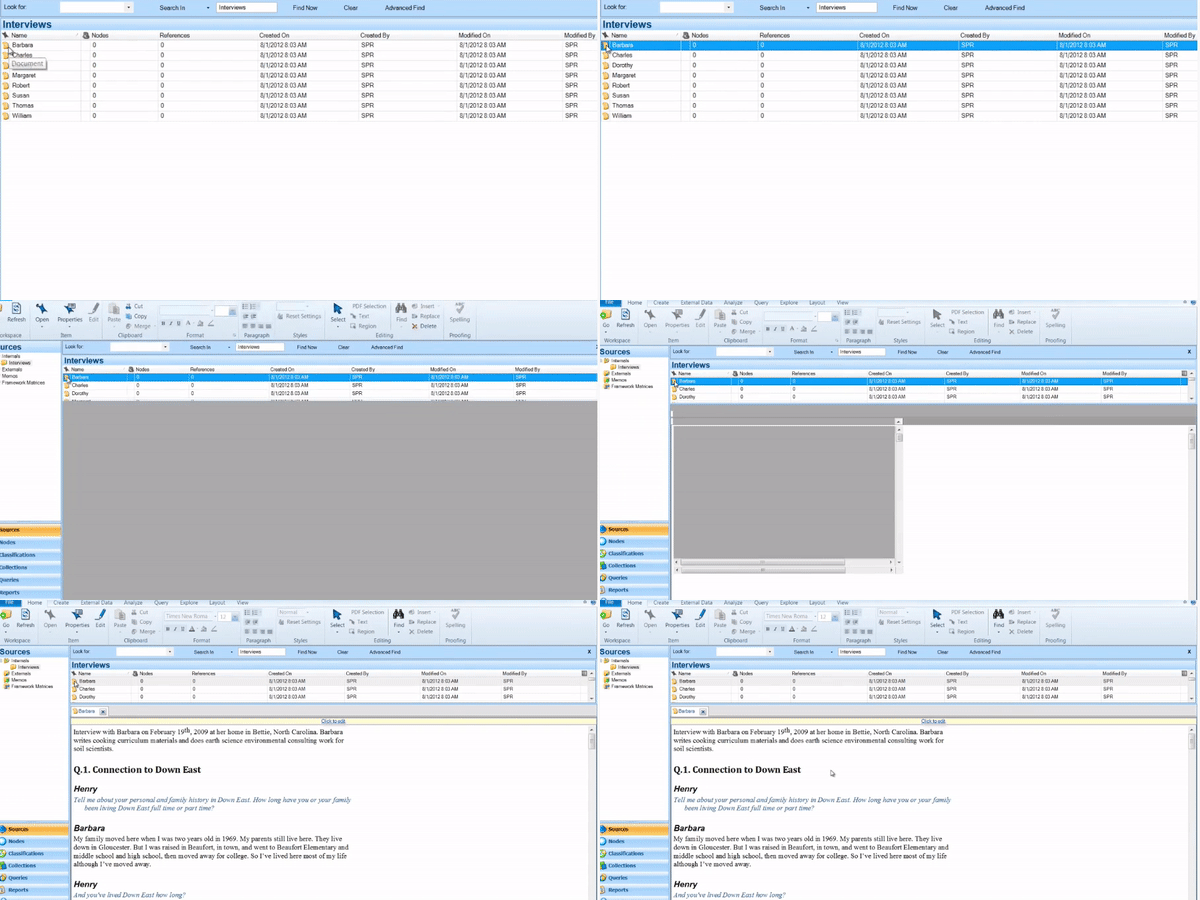
- Double click on the icons of each document to open it up and see the full text to the document available so you can start working on it.
- You can have multiple documents open.

Keep in mind
- You might have interview transcripts or field notes in Word files, rich text files or plain text files. You can import these materials into NVivo. When you import Word documents, rich text or text files into NVivo, the content of the file is imported into NVivo as a ‘document’ source. You can edit the content of the document within NVivo.
- You may have source materials such as government reports in PDF format, or a collection of archival material that has been scanned and saved as PDF files. You can import these materials directly into NVivo. When you import PDF files into NVivo, the PDF is imported into your project as a ‘PDF’ source. You cannot edit the content of the PDF within NVivo.
Congratulations you have now imported your documents in NVivo!